This Guy Just Bought His First House – A Designer’s Review
When a customer walks into my shop looking for a housewarming gift, they usually want something that feels personal, modern, and genuinely celebratory. The phrase “This Guy Just Bought His First House” has become a staple request, and I’ve been testing this specific SVG design set across multiple projects to see how it holds up in real embroidery work. Let’s get straight to the practical judgment: how does this graphic perform when you move it from a digital file to a stitched, finished product?
Listed under T-Shirt Designs and Graphics, the file arrives as a clean vector ready for print. But for those of us running a craft business or small shop product line, the real question is about versatility. Can this design pull double duty as a digital download and a reliable machine embroidery design? Based on my test runs, the answer leans heavily toward yes, with a few important caveats.
First Look: Clean Layout and Universal Mood
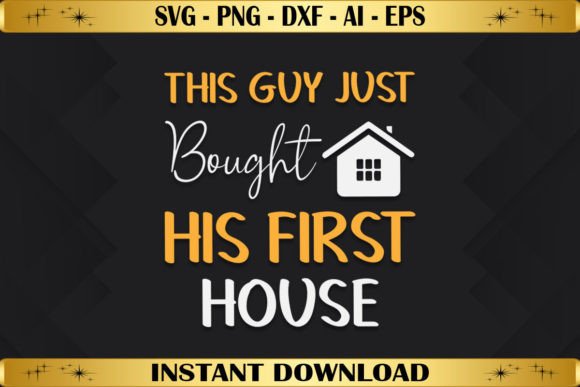
Opening the SVG file in my digitizing software, the first thing I noticed was the balanced composition. The house icon sits comfortably alongside the text, creating a horizontal layout that feels grounded and friendly. The mood is mature but playful—it avoids being overly cartoonish, which is a problem with many milestone graphics. This makes it suitable for a wide demographic: young homeowners, real estate agents, or family members looking for a tasteful gift. The font appears to be a modern sans-serif with good readability, meaning it will scale down reasonably well. The house itself has clean lines with enough detail to give it character but not so much that it becomes a thread management nightmare. As a designer, I appreciate when a graphics file respects the limitations of a needle and thread.
From Vector to Stitch: Performance on Fabric
Translating a print-ready design into an embroidery project requires a critical eye. I took the AI file and imported it into my digitizing program. The vector paths were clean, which saved me a lot of cleanup time. Here is how I broke down the stitching strategy:
- The House Body: I used a medium-density fill stitch for the main structure. This gives it a solid, premium feel on a sweatshirt embroidery or tote bag. The density needs to be checked—if the design is scaled up for a back logo, the fill could get too heavy, so I reduced the density by about 10% to maintain a soft hand.
- The Roof and Details: A satin stitch running parallel to the roof line creates a crisp, dimensional edge. The door and window details are small enough that a running stitch or a narrow satin column works best.
- The Text: The phrase “This Guy Just Bought His First House” is the centerpiece. I digitized it as a satin stitch. The kerning and spacing in the original vector are well-done, so the letters connect smoothly without awkward gaps.
I ran a test stitch on cotton twill using a 5x7 hoop. The design stitched out in about 8,000 to 10,000 stitches (depending on your scaling), which is an efficient count for a commercial product. The stitch density felt balanced—it didn’t pucker the fabric, and the thread colors popped nicely against the neutral background.
Real Case Scenario: The Custom Realtor Tote Bag
Let me walk you through a recent order. A local real estate agent wanted twelve custom embroidered tote bags for clients who had just closed on their first homes. She provided a budget and wanted something that felt boutique, not disposable. We used “This Guy Just Bought His First House” as the primary design.
I chose a sturdy 10oz cotton canvas tote. The hoop size required was a 5x7, which gave the design plenty of breathing room. I used a medium-weight cutaway stabilizer to handle the fill stitches in the house and text. The thread colors were a bright copper for the house (to symbolize a key) and a charcoal grey for the text. The stitching was clean, the registration was perfect, and the fabric texture of the canvas held the stitches firmly without distortion.
The agent loved the finished product. She mentioned that it was the best-received gift she had ever given. This is the power of a well-designed handmade product. It builds trust and makes your customer look good. This design, as a digital or stitched piece, delivers that professional feel.
Where to Use Caution: Hoop Size, Fabric, and Placement
No design is a one-size-fits-all solution. Here is where I recommend you slow down and test before committing:
- Small Hoops (4x4): The horizontal nature of this design makes it a tight squeeze in a 4x4 hoop. The text string is long. If you must use a small hoop, you may need to reduce the font size significantly, which can make the satin columns too narrow and prone to pulling. Always check the dimensions in your software first.
- Stretchy or Thin Fabric: A dense fill stitch on a lightweight tri-blend t-shirt is a recipe for puckering. If you are using this on a baby embroidery or delicate custom apparel item, reduce the density and use a high-quality cutaway stabilizer. A tear-away stabilizer will not provide enough support for the filled areas.
- Dark Fabric: The contrast between the design and the fabric is critical. The preview shows a dark house, which will disappear on a black shirt. Use a light-colored thread or an applique design approach with a bright fabric base to make it pop on dark backgrounds.
- Caps and Curved Surfaces: This design is long and wide. Putting it on a standard cap frame will require you to heavily curve the text, which might distort the house icon. I would avoid this for structured caps unless you are experienced with cap digitizing.
- Commercial Licensing: You are purchasing a digital embroidery file download. The package includes SVG, DXF, AI, EPS, and PNG files. Before you sell the finished product (the embroidered item), confirm the terms of the license. Most standard graphics licenses allow you to sell physical finished goods, but do not resell or share the raw digital files. This is a standard practice for Etsy sellers and small shop owners.
Practical Designer Notes for a Flawless Finish
If you are planning to use “This Guy Just Bought His First House” in your production line, here is my workflow checklist:
- Test on Scrap: Always stitch a test on a fabric similar to your final product. Adjust the stitch density and thread tension before touching the customer’s garment.
- Thread Color Strategy: Use the PNG or EPS preview as a color map. Match your top thread to the design’s palette. For a vintage look, use a single color (like a solid red or white). For a modern look, use two contrasting colors for the house and text.
- Stabilizer Choice: For sweatshirt embroidery, use a medium tear-away. For tote bags and kitchen towels, use a medium cutaway. For delicate knits, use a lightweight cutaway with a topper.
- Check Small Details: Zoom in on the SVG file. Look for any tiny windows, doors, or decorative lines. If they are smaller than 2mm, consider removing them or making them thicker. Tiny details often become blobs of thread in a fill stitch.
- Respect the Hoop: Do not force the design into a hoop that is too small. A cramped design looks unprofessional. If the customer wants it on a small item, suggest a placement like a left chest or a small embroidered patch instead.
Final Verdict: A Smart Asset for the Modern Maker
“This Guy Just Bought His First House” is more than just a printable graphic. For the embroidery designer, it represents a reliable, scalable, and commercially viable asset. It fits naturally into T-Shirt Designs catalogs and serves as a bridge between digital products and tangible, handmade products. Whether you are creating a personalized gift for a family member, a holiday embroidery special for a realtor, or a stock item for your craft business, this design has a strong return on investment. It stitches well, it delights customers, and it builds the kind of brand trust that keeps people coming back. I recommend adding it to your library, but remember to test, stabilize, and respect your hoop limits. Do that, and this design will work hard for you.